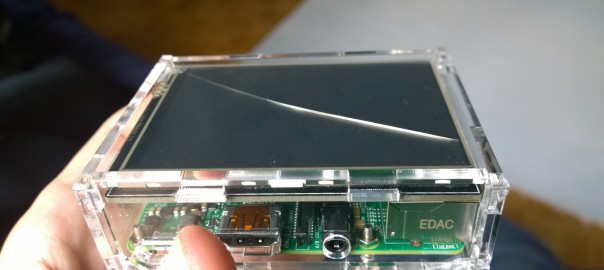
I orderer a 3.5″ SPI touchscreen with a Raspberry Pi 2 and a case, thinking it would be easy to set up, as it seemed to be like the one here. Unfortunately that was not the case.
TL;DR
To install precompiled kernel version 4.1.x for Raspberry Pi 2:
- Install latest Raspbian
- Download this archive here (19.6 MB)
- Take the micro-sd from RPi2 and mount it on your Linux computer
- You should see two partitions mounted, one fat32 (BOOT), one ext4
- Open the archive, and copy all files under folder fat32 to the BOOT partition
- Copy all files under folder ext4 to ext4 partition
- Add a line to your /boot/config.txt: “
kernel=kernel-screen.img“ - Add a line to /etc/modules: “
ili9341“ - Now booting should result having the screen white
- You can change the terminal to the screen by using command “
con2fbmap 1 1” and back with “con2fbmap 1 0“ - You can change the X to the screen by modifying /usr/share/X11/xorg.conf/99-fbturbo.conf: change “
fb0” to “fb1“
More details
With some googling I found out it was made by KeDei LCD and exactly this screen. Identifying strings on the screens were “Madei in KeDei of china”, “3.5 linch SPI TFTLCD”, “480*320 16bit/18bit” and “vision 1.0 2015/6/11”. I hope the guys who made this screen can write code better than english… Seems like it requires custom drivers by KeDei. Drivers could be downloaded from Baidu and they include the diff to compile your custom kernel. I haven’t compiled kernels before, so lets see if I could manage without doing that.
I downloaded drivers and installed them in a fresh installation of Raspbian. They worked, somewhat at least. I could see console in the screen and also LXDE started in it. However it seemed to override HDMI output completely, as it was /dev/fb0 and no other framebuffers were present. Touchscreen appeared in /dev/input/event0, but I couldn’t get it respond. Probably the touch sensor is defective, as the glass on the screen also had a crack. I did get a free resend however, so I’ll see whether it was defective hardware.
The drivers replaced current kernel with a custom 3.18.x version with drivers in it, so you can’t update kernel if using that method. Perhaps I should try to compile more recent kernel with drivers.
I installed Ubuntu on my Macbook Pro on an external hard drive (which is a whole another story, thanks to EFI), so I could follow instructions on Raspberry Pi pages. Compiling on RPi is quite slow (tried that overnight), so cross compiling is the way to go. Following the instructions worked pretty well, however I cloned tools to my home directory and added /home/heikki/tools/arm-bcm2708/gcc-linaro-arm-linux-gnueabihf-raspbian-x64/bin to my path. After that everything worked as expected. After cloning and changing branch to rpi-4.1.y I patched semi-manually from the supplied diff from KeDei, however I have uploaded my updated diff to make it easier for you. There’s instructions on patching too, but long story short it’s “cat <patch-file> | patch -p1” in the base directory of the clone. The version I used was branch rpi-4.1.y, commit 785cea66a709eddb9858799192a7b7da566b44b0.
Update: I accidentally updated kernel with apt-get, so I tried to compile the kernel to the latest. However I noticed the patch missed a whole file, which belongs to drivers/video/fbdev/ and is attached here: ili9341.c. I still couldn’t get it right, so I just installed the previously compiled kernel.
I configured the kernel pretty much default, but the ili9341 drivers enabled. My config can be found here. Finally I got the kernel compiling. The config and built kernel are only for Raspberry Pi 2! For Raspberry Pi 1 you need to reconfigure the kernel and build it your self.
Installing custom kernel was simple following the kernel building instructions. I had an updated Raspbian on the sd, and copying the files over seemed to suffice. I have the copied files in an archive here (19.6 MB). You can hopefully figure out where to copy those.
I used a custom name for the kernel file (kernel-screen.img), so you should also add a line to your /boot/config.txt: “kernel=kernel-screen.img“. Now booting will use our custom kernel! However the touchscreen remains empty. That’s because the module for the screen still needs to be loaded, you can try it with “sudo modprobe ili9341“. If and when it works you can add a line to /etc/modules: “ili9341” and the module is automatically loaded on boot.
You should now have two framebuffer devices, /dev/fb0 and /dev/fb1. I’m not quite sure how the fbtft library interferes with the patch, as it seems to be activated too, but it works so no problem. (Actually I first activated module fb_ili9341, so you can try that too, if it contributed to my success). You can change to console to fb1 by command “con2fbmap 1 1” and back with “con2fbmap 1 0“, or on boot by editing /boot/cmdline.txt: add “fbcon=map:1” to the line somewhere. You can also change the font with “fbcon=font:ProFont6x11“. More things like this here.
The framerate on this screen is really slow, something like 0.5 secs to refresh the screen, so no video playback on this screen. For simple GUIs probably quite sufficient. Haven’t tried whether backlight can be controlled, probably not, so always on.
I’ll test the touchscreen with custom kernel later when I get the new unit. The touchscreen driver seems to be added (/dev/input/event2 for me with Logitech keyboard/mouse connected), so it might work.
Update: Touchscreen working with patched kernel out of the box.
By the way, I had to make the A/V connector hole a tad larger to fit. One side of scissors through the hole (from inside) and carving did the trick.
73 replies on “Raspberry Pi TFT”
Hello,
first of all I want to congratulate you on your post as it was very helpful to understand how to get the Tft screen to work.
Unfortunately, many of us are dehabilitated of downloading the source code from Baidu, so I wanted to ask if it is possible to upload the files from KeDei to Google drive or something.
Thank you
Hi, thanks for the comment.
I uploaded the ”driver” (really a kernel+modules and a script to copy them in place) from KeDei to Mega: https://mega.nz/#!tVQEiSyA!-84GlZkWD7Hb5eVA8QdH7c5yvy-e26q9wUkkE1JkRYw
The kernel however is quite old and might not support all the features in later versions, so it might be better to use the kernel + modules I compiled (only for RPI2) or compile and install kernel from sources, it’s not really that complicated.
Thx a lot for your post ! It helped a lot ! you rock !
I could install that KeDei LCD screen I received by updating the stuff you described 🙂
Thank you again
can you give me a list of instructions on what you did to install these drivers
Hi,
I will add a TL;DR section to make things a bit easier.
Great help getting this screen to work.
Inexpensive screen but quite slow. 🙁
Thanks!
Pablo
Have you been able to make it work with fbtft (https://github.com/notro/fbtft)? It has a ili9341 driver but I could not get anything from it.
Hi, I haven’t made it work with unmodified kernel. With the patched kernel it seems to use fbtft however, so probably the patch initializes the screen, so fbtft can use it. The screen doesn’t have reset pin, which seems to be required by fbtft.
Thanks for the write up on this LCD. I recently bought the v2 board from a third-party re-seller but they only supplied the v1 drivers which caused the colors to be inverted. I finally found the proper pre-built image on baidu but I want to use a newer kernel and I have not been able to get your uploaded files to work. I am now trying to compile a custom kernel from the original source.diff located on baidu but I noticed that there is only one patch file. Do you have any idea as to whether that patch should work for both versions of the board?
And also, what exactly do you mean when you say that you patched the kernel “semi-manually? I ask because it seems that your patch is very different from the original (at least in format) upon first glance.
I know that these questions are better asked elsewhere, but I highly doubt that the manufacturers would be much help and you seem to have spent a good amount of time figuring out this poorly documented peripheral .
Thanks in advance
Hi,
I had no idea there was a v2, and I don’t know what the differences are. I patched the kernel using the supplied diff first, but as it was for an older kernel, it didn’t find all the places it needed to. So I manually looked for appropriate spots in the code to make similar changes, which seemed to work alright.
Sorry I can’t help better with the v2.
Hi, I’ve just managed to compile a working kernel for my V2 screen. Please, see my post and let me know if that works for you:
http://frec.pl/blog/compiling-custom-raspberry-pi-kernel-with-kedei-35/
Great! Thanks!
Heikki,
Thanks for your help in trying to get this LCD module working. I’ve followed your tutorial and even after that it did not worked. Could you please provide a system image so that I can test it?
Thanks in advance
Hi,
I don’t want to supply a whole system image, but I will add an TL;DR section, which should be more straight forward to follow.
Thank you indeed. I think I’m missing something on the kernel configuration because even though it seems to work there is no way to assign video from fb1 to the display. I’ll try to compile it again. ;D Can you please say how did you achieve the kernel configuration file?
Hi,
I configured the kernel with the help of Raspberry Pi documentation, using menuconfig. Under video drivers, the ILI9341 driver needs to be selected (I chose it as a module). Other configurations can be left as is, that should work, or at least it worked for me.
Hello,
I have a KeDei v2.0 Display. The driver from the seller works pretty well, but i have a problem using the other GPIO Pins. When I try to use a Pin in a python program, lets say to get Temperature and Humidity from a DHT11 it says, that I must be root to have access to the GPIO Pins. This happens even if I execute it as root/sudo. I think they are locked by the Driver or something. The samehappens if I use the complete raspian image provided by the Seller.
Please help me 🙁
Hi,
I don’t know about the version 2, but in the version 1 drivers some blocks of code regarding I2C was commented out, possibly the screen uses the same pins etc. so that might not work. I haven’t tested if other pins work on my rpi2, so I can’t say if it’s something in the new version.
hi,
I have a KeDei v2.0 too, but i cant work it, Is it possible that upload your drivers for me ?
http://frec.pl/blog/compiling-custom-raspberry-pi-kernel-with-kedei-35/
Please, see this post for V2 screens.
Hi, First of all huge thanks for this, i was pulling out my hair trying to get this screen working!
I have 2 memory cards, one with debian jessie and another with retro pi, when adding your kernel/modules as per your instructions, upon booting the screen is frozen and i cant see any display (neither on my led nor the tft)
but when i apply your steps on the retropi sdcard, it boots to the terminal shell fine, startx wont work, emulationstation loads on my tv, i did notice 1 thing when booting up retropi, it says
map: vt02 => fb-1
open /dev/fb-1: no such file or directory
any help getting this to work w/o my led
Hello
Heikki, thanks method works perfectly! 🙂
I have a problem with the display KEDEI,
on the firmware from the seller and manually compiled the colors as I would, being shown one color missing.
The question is whether it can be bad compilation or connection?
IMG http://postimg.org/image/m2f9n0cdz
Hey MichaelZ!
I have the same effect like you describe yours. The image looks a bit like a color is missing or like if it is inverted. Did you get any solution to that? I’m currently stuck on that.
I used this description: http://osoyoo.com/wp-content/uploads/samplecode/rasp_lcd.pdf
Hi..
I observed there are two kernels we have.
One, what is given in TL;DR which is 19.6 MB and the other KeDei which is 104 MB.
I have a KeDei screen. Which one I should use and how.
Thanks in advance.
Kv Rajan.
Update:
I simply followed the instructions and used the img file given in the PDF for 3.5 inch Osoyoo LCD screen and it worked like magic.
No need to touch it edit any OS file.
http://osoyoo.com/wp-content/ uploads/samplecode/rasp_lcd.pdf.
This was it.
Could you add a TL;DR for your compiling the kernel. I would like to compile a newer kernel for my Pi, but seem to fail in doing so.
Hello,
I tried to do the copy of the files as you indicated on a Debian Linux machine I set up on a Mac Mini just for this purpose, but I am completely unable to do it because my micro SD card that I’ve loaded a Retropie setup on previously is shown as read only and I have been completely unsuccessful in changing both file ownership and permissions even after spending quite some time googling the proper terminal commands. Any thoughts as to get around this? Thank you for any help you can provide.
I have a new Pi Zero and note that it will only work with the latest download which is Jessie. I think the boot loader is new. It came from NOOBS 1.5.0.
None of the img files I download will drive the 3.5″ screen on the Zero that is a kedei but a B and a 2 work with them.
Should I expect any of the above advice to work on a Zero?
Well, I tried the simple adding of files from the kernel-screen download above, top of page, on a fresh NOOBS 1.5.0 (Jessie) using a Linux box.
The 3.5″ screen stays white.
The main hdmi monitor gets to the colour splash then the NOOBS setup screen. Nothing after that and nothing from external ssh terminal.
Pi zero would be good with this LCD with on screen keyboard etc.
Another problem.
Using the manufacturers image on a B works fine.
If i mve the SD card to a Pi 2 I find that i2c fails with –
bcm2708_i2c bcm2708_i2c.1: could not get IRQ
in dmesg
(I did move i2c from 0 to 1)
any comment welcome!
[…] http://heikki.virekunnas.fi/2015/raspberry-pi-tft/ […]
After messaging back and forth with my seller I have managed to get hold of the pre-compiled images. You’ll need to check the bottom of your board for which version to use. Once you have downloaded the image from one of the links below simply write the image to your SD Card with Win32DiskImager.
Board Version 1 : http://jaredkindred.com/software/raspberry_3.5LCD_V1.rar
Board Version 2 : http://jaredkindred.com/software/RPI_35_driver_v2.tar.gz
Board Version 2 (Raspberry Pi 2) : http://jaredkindred.com/software/rpi_35_image_v2_B_B+_PI2.rar
Board Version 3 : http://jaredkindred.com/software/rpi_35_v3_jessie8_kernel_4_1_12.rar
Hi,
does anyone got the V2 display running on the new RPi zero?
Thanks,
MrFX
Hi Jared,
This did the trick for me. I have had my version 2 board for months and was unable to use it. Glad I checked back and found your distro links. Thank you so much!
thanks for sharing this! the screen resolution is much better with the richt version!!
The color seem to be inverted on the display
thank you all!!!!!
i coundn´t get my screen to work until i came to this blog!
thanks again!
can i rotate the screen? because i don’t want to use it in landscape mode 🙂
thanks
Hello gurus,
I have a version 3 LCD up and running. Question: Is there a way to ssh to the Raspi and turn the display off? I still want to have the computer running…
Any experience doing this with the KeiDei display?
TIA,
David
Hi,
Is there an option to rotate display + touch?
Thx!
I don’t want to have to download a kernel! Isn’t there a precompiled module we can install then use insmod
Hi,
Need a working image for a P2 with a version 3 LCD.
This one works but the letters are mirror images…. Its also no Jessica and when I update it doesnt work. I would stick with Whizzy, but as I said the letters are reversed.
http://jaredkindred.com/software/rpi_35_image_v2_B_B+_PI2.rar
I tried Board Version 3 : http://jaredkindred.com/software/rpi_35_v3_jessie8_kernel_4_1_12.ra but that doent seem to be an image I can just burn to SD.
Any help would be appreciated. If someone had a working image for V3 that would work on a Pi2 or a PiB+ an they share it.
Thanks
Les
Hi,
mine just arrived, and it is named :
KeDei
3.5 inch SPI TFTLCD
480*320 16bit/18bit
version 4.0 2016/1/1
Of course, debian image for board version 3 not work very well, like some many noises on the screen but it’s possible to see difference between console and desktop.
Touch seems to work.
What informations should be usefull for you to help me ?
Hi,
juste received mine, and… this…is…V…4 board of 2016/1/1.
image for board V3 not work properly, the image have many noises but we can see difference between console and desktop.
How to make it work ?
Thanks
Adrien
https://drive.google.com/file/d/0B6yht2NfeHVja1NwOGxPeXJNSEE/view?usp=sharing
Install this image.
Is it possible to use both LCD display and HDMI output with this? Only LCD display is working after I boot with this image, HDMI is not sending signal at all 🙁
Hello Adrien,
Here you have the drive for board V4.0.
https://dl.dropboxusercontent.com/u/2183/LCD_show_v4.tar.gz
Hi Jose
Is it possible to install your driver in to RPi2 with Openelec 6.03
Thanks
BeBoBu
I also just purchased 2 of these, they are V4 boards.
my setup is a bit different though, as I am running Debian Jessie on an “Orange Pi PC” instead of RPi.
So aside from the fact that I already have Linux setup the way I need it, just putting a Rasbian image on an SD card will not boot on my Pi due to the hardware being entirely different although similar.
I am currently using this setup to control the circulation fan (and eventually a stepper motor on the intake vent) for my wood burning furnace which is heating my entire house, and i’d like to use this screen as a secondary display showing a simple control interface (basically a touch screen thermostat control on the wall)
If there is anyone who has advice on how I might go about doing this, maybe through python script using SPI? I’d greatly appreciate the input.
Or if you’re looking to buy an “Orange” variant and have questions? I’ve made some decent progress so far, I have I2C and 1-Wire interfaces working on it and access to the GPIO’s (it too, like this screen has very little documentation/support but is very cheap to buy)
Hey, I’ve tried just about everything I can think of to get this thing working and I cant. What I basically just want to do with this is be able to stick it on my pi and be able to use python with this sucker (so a basic portable programing computer). If anyone has done something like this, can you tell me everything you had on your sd card and every software you had on your PC (not the pi, I have a windows 8.1) to format the sd card and whatnot. My version of the screen is a 3.0. Thanks in advance.
Hello,
helpfull thread. I also just received a v4 2016/1/1 board.
@Jose
thanks for sharing the version 4 kernel, etc.. Can you give some more information how you created those? Just to be prepared for the next kernel update.
@Jose
+1 for detailed instructions
I got the following link from my vendor, but I can’t understand anything.
http://pan.baidu.com/s/1i4cKsF7
Hi i have a rpi kedei display its says v4.0, i tried ur tl;dr but tge colour is inverted ..please help
Just letting you know that I just bought this from ebay, and it’s version 5.0 2016/3/1. And I ordered it on 2.3. So fresh out of the line. So maybe getting this to work will be hard. So far I’ve only found v4 image from some link that was posted on amazon entry selling this and seems to be the same posted here. I would like however to install vanilla raspbian and add these drivers.. So.. I’ll start with the v4 image and try also Heikki’s instructions… but do you think they require new driver for every version?
There here; v4 and v5. Good luck trying to download?????
Rob
cedei.net
If somebody searches these, the Manufacturer is KeDei and they have page for these: http://en.kedei.net/raspberry/raspberry.html
Anyone downloaded v5 image or drive from here and uploaded somewhere else? The download is really slow even on a very fast broadband connection.
Ok so here’s how I got this working. I downloaded the above kernel and that was all. (If you can’t unzip it, try downloading a .rar unpacker and then go to downloads and it should have its own folder). I then put the (unzipped) file unto the sd card (Don’t worry, although other people haven’t said it, it is a vital part). You then download win32 and get that running as an administrator. You probably wont see the zip file anywhere on the desktop while on win32, this is why we copied it to the sd card. Ok so you go to computer and then removable disk # and then you see the file. If you try to burn this image it wont work. You are going to have to copy it back to the desktop IN WIN32! You will then be able to see the file in the win32 browser and then you can burn the file unto the sd card. Just wait, pop it out and then plug it into the pi. You don’t need any of the drivers people are talking about. Well, maybe you could use them but I wouldn’t, just too complicated. The os is going to be like noobs, you may want to do some more researching on how you can get some of your software you want on it, but its fine for me. I haven’t figured out the onscreen keyboard yet so if anyone can get further than me or if I figure it out, post it. I hope this helps, and if it doesn’t, just get the official display. All you have to do is plug it in and put in 4 screws. Totally worth it for the costs.
I got the v5.0 working by installing the drivers. I have wheezy (volumio 1.41 image). So the v5.0 drivers at least work as they should.
Sorry guys, I need your help!!
First of all, I’m a complete noob and a newbie in Rasp world!
I bought this TFT, it’s 4.0 version. I have a Raspberry Pi A+ on which i would make working the KeDei display.
I downloaded the 4.0 Raspbian img with display driver from the link of KeDei.
Because my SD card is only 2GB, I had to write the image on USB drive and then I copied the files (about 59mb) on SD Card and edited cmdline.text changing “root=/dev/mmcblk0p2” to “root=/dev/sda2”.
I inserted the SD in the Raspberry, powered it, and the screen stopped at “random: non blocking pool is initialized”.
What was wrong? Was the procedure from USB to SD wrong? Or is my Raspberry A+ the wrong version?
Thanks in advance!
probably did some wrong coding, or the sd card has too much data on it. You can check with SD Formatter, which you can find and download online. If you want just follow my steps exactly like I did (I also had a 4.0) after you cleared the sd card. Im not saying that adding the new code was wrong but im just not familiar with that procedure. 😉 Good Luck!
Anybody have any luck with V5.0?
http://en.kedei.net/raspberry/raspberry.html will take 3 days to download.
Does anyone know how to permanently change the size of the screen because the windows are way out of proportion.
Sorry, this is stupid question
I have the KeDei screen V4 and downloaded driver from KeDei link. My Pi2 is running with Openlec 6.03. Is there any one tell me if possible to install the driver to my Pi2 as well.
Thanks in advance
Because this post is so awesome, I’m going to get this screen (v5 2016/3/1) on Android 6.0.
This is what I’m going to work on this week and I should be able to complete it by Sunday evening.
I will keep you all posted!
see my problem is that when i installed the drivers they came with everything but a config file and i cant seem to figure out how to get it. no matter what i do i cant obtain the config file for my LCD and thats it. I have the same one as you and when i clicked on the link you put as to where you got your drivers i was greated with something about security or a buissnes planner or something please help.
Hi,
Excellent work Heikki! Thanks also to Filip Rec for figuring out the required drivers!
I posted simplified instructions, a script and precompiled binaries for V2 based on this page:
http://johan.ehnberg.net/raspberry-pi-tft-kedei-3-5-touchscreen-v2/
Enjoy!
[…] I recently bought a KeDei 3.5″ touchscreen V2 for my Raspberry Pi 2, but do not want to use the old kernel and untrusted images provided by the vendor. However, the display needs a customized kernel and drivers to work. To make it work on a vanilla Raspbian Jessie, the fastest way is to use my precompiled kernel and otherwise follow Heikki Virekunnas’ TL;DR. […]
Hi,
i tried to compile it with the latest linux kernel. But the diff doenst work for the current sources e.g. the bcm2709.c file is totally different.
Has anyone tried to get the display to work with a more up to date kernel?
Did anyone manage to patch Kernel 4.4?
The diff is completely different, looks like the code was refactored.
(I’m using a Raspberry Pi 3 with KeDei v6.2).
Happy Holidays!
I am struggling with a v5 screen and a Pi version B.
I can’t download the v5 driver – only v6 and it is just not working.
I have tried the TL;DR section – not working (coloured screen on S-Video output, white screen on TFT).
After that I have seen the comments, and downloaded v6 driver. Installed. Not working: nothing on S-video (this wouldn’t be a problem if the TFT was working), but TFT shows white screen.
Please help me,
thank you!
Attila
Some progress, although still not perfect:
I have found v5 driver, I have installed it. it starts to boot but I get the following messages which I don’t understand:
[ 0.143549] bcm2835-mbox 2000b880.mailbox: Failed to regi ???
andler: -22
[ 0.214340] bcm2708-dmaengine 20007000.dma: failed to get ???
[ 0.221701] bcm2708-dmaengine 20007000.dma: failed to get ???
[ 0.229192] bcm2708-dmaengine 20007000.dma: failed to get ???
[ 0.238893] raspberrypi-firmware soc: firmware: Failed to???
[ 1.504686] sdhost-bcm2835 20202000.sdhost: get IRQ failed
I guess i have to start again (with creating system image on SD card) as in this state I have no access to the Pi…
Any ideas?
Thanks